
Archive for the ‘Design Projects’ Category
Foundation Underway for a Small Addition in Richmond, California
Posted in Design Projects, tagged green, houses, Richmond on October 2, 2011| Leave a Comment »
Kids Like Lofts
Posted in Design Projects, tagged Berkeley, children, fun, interiors, kids, Lofts, whimsy on September 29, 2011| 1 Comment »
 There is something really nice about climbing up a bookshelf ladder to a cozy loft and looking down on the party from above. (photo by Joma Jones)


Progress on the Fairfax, California Passive House Addition
Posted in Design Projects, tagged Fairfax, green, houses on August 30, 2011| Leave a Comment »
I took a trip to Fairfax this morning to check out the progress on this creekside addition. The owner and many of his family members are undertaking the construction of this 800 SF addition and remodel of an 100 year old cabin themselves.
Justis Fennell, a passionate Passive House enthusiast is seen here on the front porch talking on the phone to one of his air sealing product suppliers. Justis is the Air Sealing Specialist for the project.

This is the house from afar. The decision was made to carefully remove all of the old painted redwood siding, add plywood sheathing, 3/4″ xps insulation (R4), and a drainage plane, and reinstall the original siding as a rainscreen.

This is the client, his brother and uncle working on installing the last pieces of roof sheathing.

Here you can see the start of the airsealing process – bright blue Ecoseal that is installed using a high powered airless sprayer to make sure it gets deep in to all the gaps and crevices. You can also see the 24″ oc 2×6 framing.

Framing Photo here.
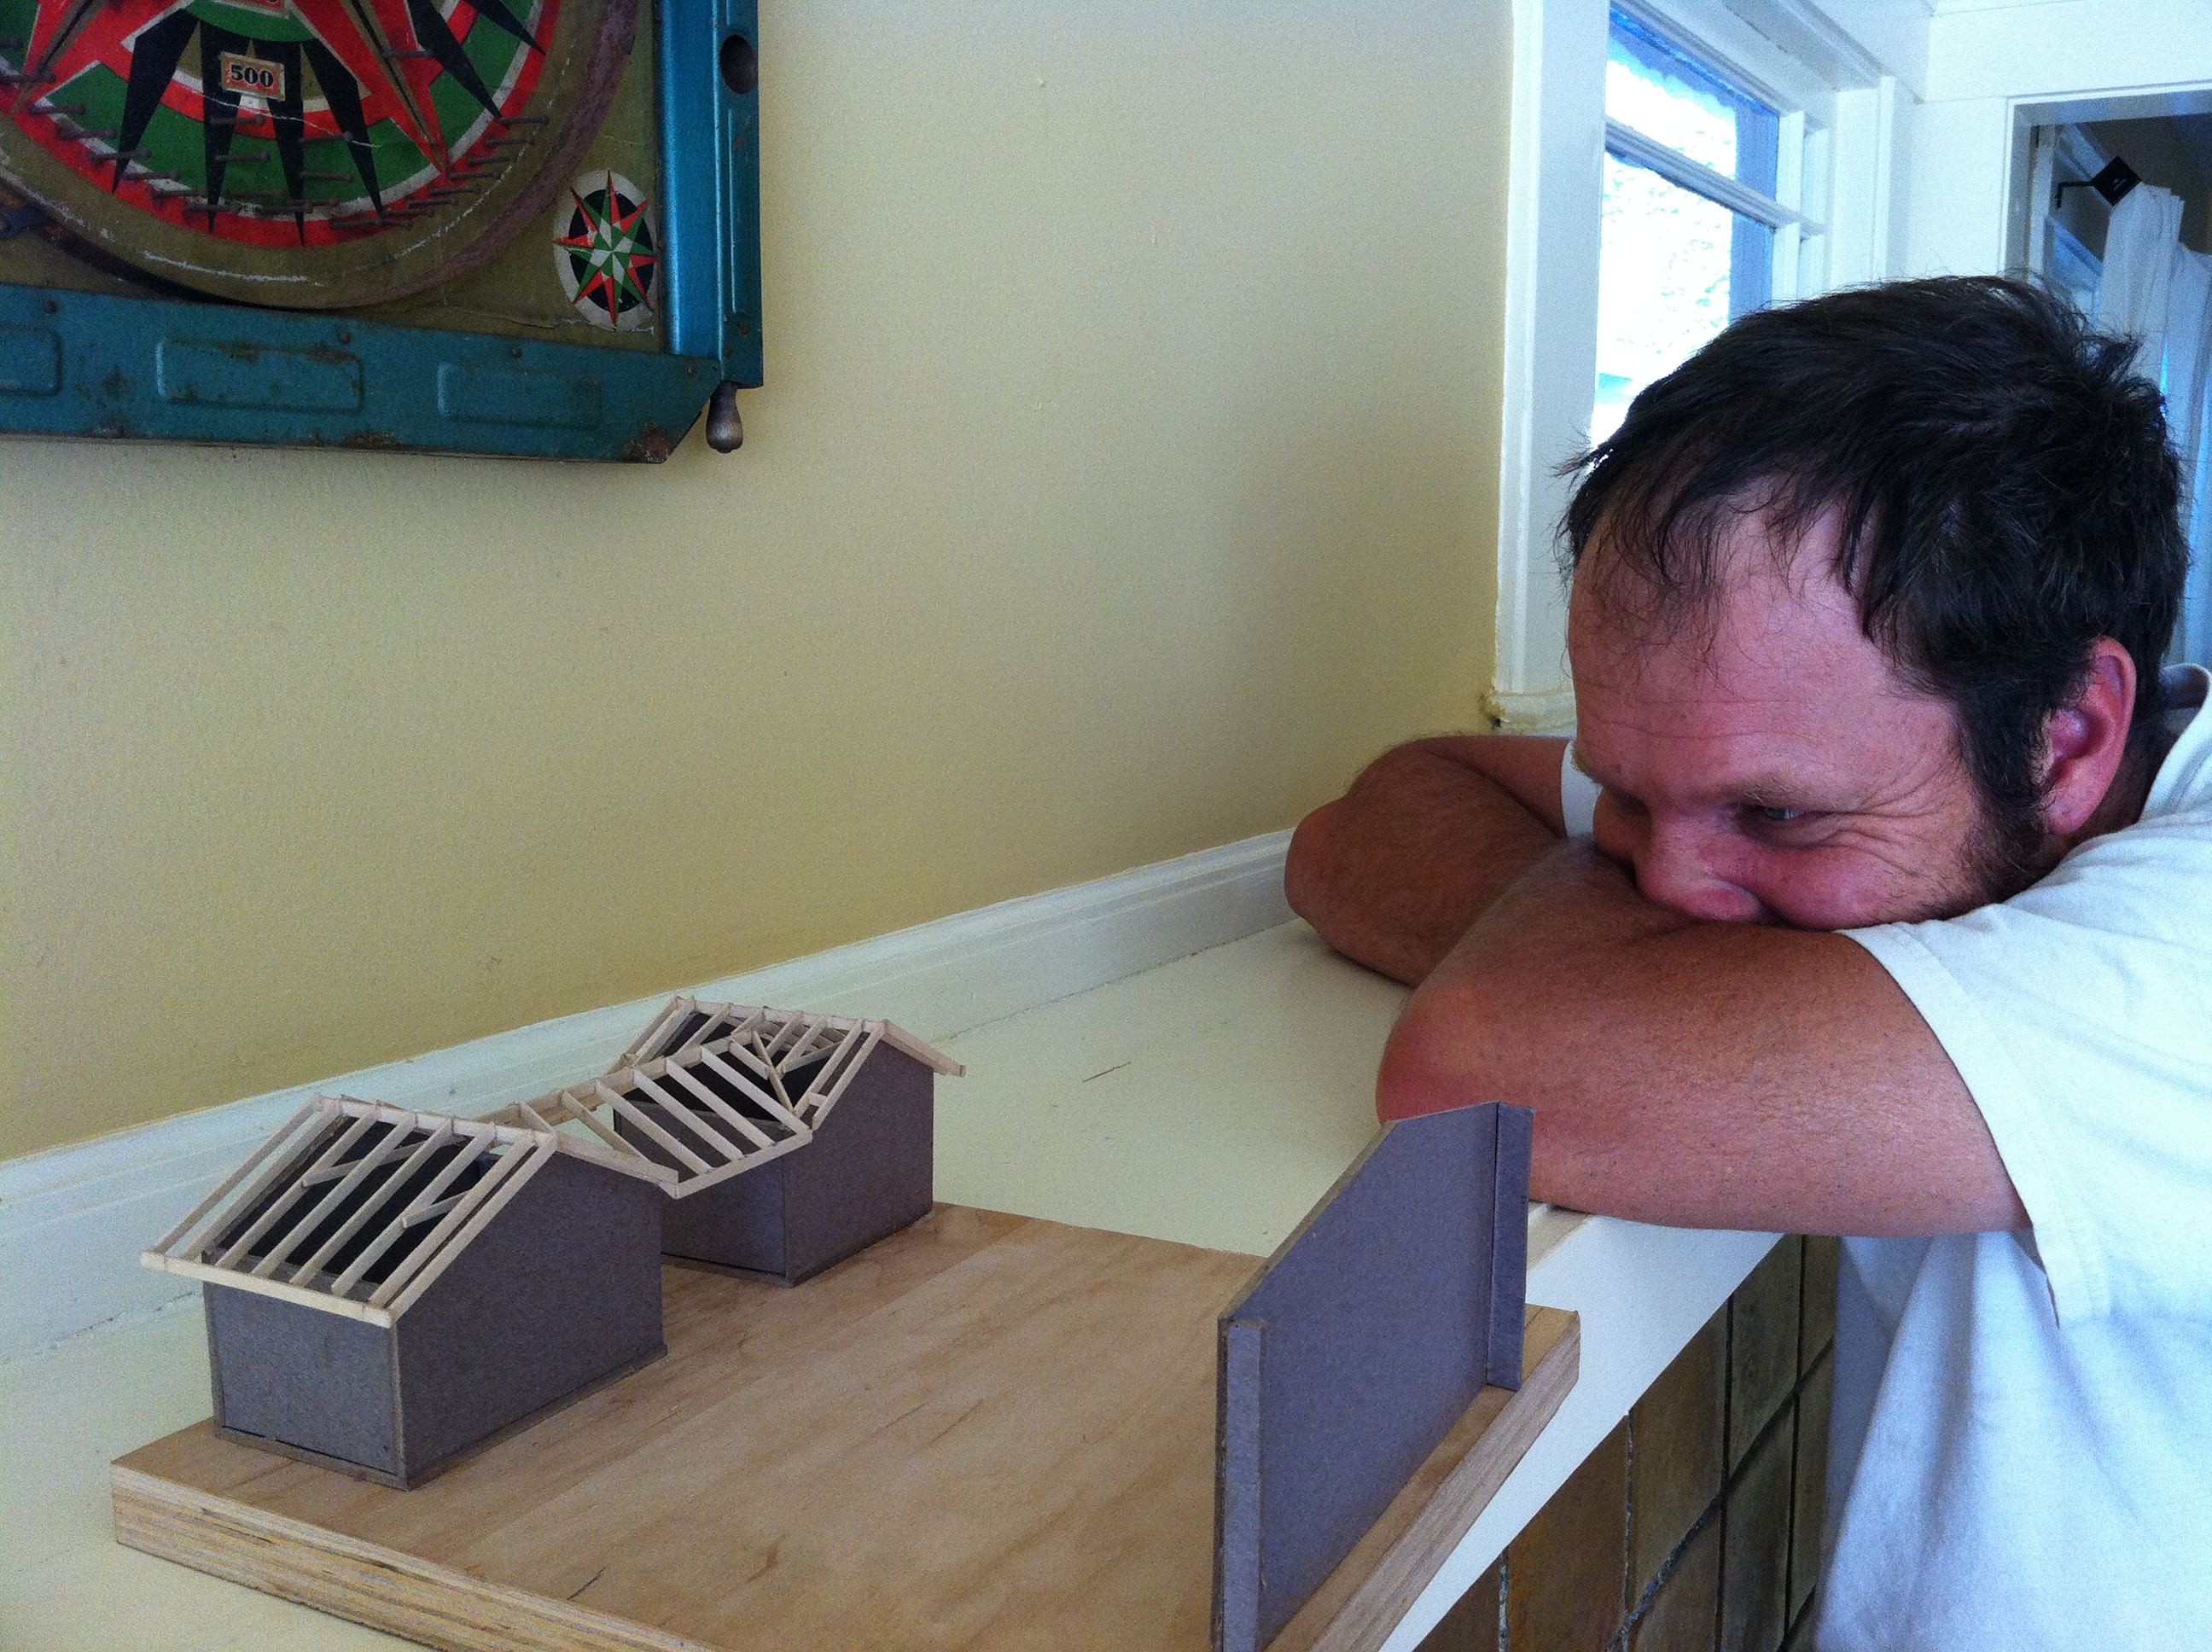
My new model making apprentice…and client
Posted in Design Projects, tagged small buildings on August 8, 2011| 1 Comment »


My old friend Matt Hornby (Landscape architect, garden designer/builder, & stone mason,) and I are collaborating on the design of a little garden building at back of his yard. Matt built the model himself.
Its going to be nice!
Advanced Framing Underway in Fairfax, California
Posted in Design Projects, tagged green, houses on August 3, 2011| Leave a Comment »

1) Insulated headers
2) 24″ on center 2×6 studs
3) windows placed and sized so as to minimize extra studs.
The main reason for advanced framing is to minimize thermal bridging, side benefit: less wood used.
Adrian Higgins from the Washington Post Interviews Deedsdesign
Posted in Design Projects, Information, tagged garden buildings on June 22, 2011| 2 Comments »
Adrian Higgins writes about gardens usually, but this article is about little buildings in the garden. The featured building, “Broadhurst’s Crib” is pretty cool. Its rainscreen is made to glow because all that is behind it is translucent plastic.
Small buildings in the garden are great because you get to really be in the garden while having some shelter and maybe electricity. In a small yard there is incentive to make the building as small as possible because this means more garden and less building.

In this case, the building is an unusual shape to minimize impact on the garden and the southern sun and to maximize efficiency on the interior of the 120 SF building.
The Apartment Kitchen with Ash Veneer Cabinets, Solid Ash Bar, Richlite Counters
Posted in Design Projects, tagged ash, kitchen, lighting design, patterns, richlite, tile, wood on May 23, 2011| 5 Comments »
The before shots of this custom kitchen are here. It was an enjoyable design process with a creative and very involved client.
This is a view of the kitchen from the entry hall
Warm glow of orange glass pendant lights
Iridescent orange and gold accent tiles are like music notes in the field of white rectangles
Shimmering figured ash cabinetry with simple mortised drawer pulls (Freedman and Chesley Custom Cabinets)

Close-up of the beautiful solid ash curved bar top (also by Freedman and Chesley, Emeryville, CA)
 Custom designed cabinetry to fit the client’s tansu pieces
 Intersection of black, white, and warm wood (the black Paperstone countertop matches the tv cabinet across the room)
 Laundry and pantry are conveniently close at hand behind a subtle white-painted pocket door

 Architect and client in the new kitchen!
Spice Cabinet with Hidden Compartment
Posted in Design Projects, tagged furniture, plywood on May 19, 2011| Leave a Comment »

John is working on this little cabinet to fill an abandoned chase in my cousin Lara’s kitchen. She got the cabinet in exchange for a month or two of weekly cello lessons. What a deal!
Black sculpture installed!
Posted in Design Projects, tagged Alameda, black, color, furniture, paperstone, richlite, sculpture on May 17, 2011| 2 Comments »

At last this sculptural TV cabinet is in place and all the cords contained neatly in the base.

The seven variously sized compartments are designed to hold the cable box, remote controls, and perhaps a dvd or a few books. The two seams in the Paperstone top elegantly slice the pentagon into three pieces. The sturdy painted poplar blocks that form the support structure are staggered in and out. The deeper set blocks disappear into the blackness of the piece.

Thanks to Gabe of Semolina Designs for selling me the remnant and helping with fabrication of the Paperstone top.
I’ll post photos of the finished kitchen next.
The Death Star
Posted in Design Projects, tagged furniture, paperstone, process, richlite on May 8, 2011| Leave a Comment »
While I was working on this piece, the Royal Wedding occurred in England. Queen Elizabeth was praised by the press for the “timeless elegance” of her cheerful yellow suit and matching hat. It is proper for a queen to be dignified yet approachable. Reading about the contrast between the queen’s attire and the more modern styles that were worn by other guests reminded me of the contrast between my two recent furniture projects. The yellow corner cabinet is cheerful and whimsical, while the simple, black, angular lines of the TV cabinet speak a different language.

It has been a complex design and assembly process, accommodating various components and cords, but it is almost finished.

One more coat of polish, and then we deliver and install.
How to Measure a House
Posted in Design Projects, Information, tagged houses, process, San Francisco on May 5, 2011| Leave a Comment »

Architect measuring the back stairs
I’ve been busy starting a few new projects the past couple of weeks. All three projects are small additions on the back of houses; one in San Francisco, one in Livermore, and one in Richmond.
Measuring a house can be tedious, so I often begin with just the basic dimensions and information essential for the project. I can always verify and fill in details later as needed. Beyond breaking the task into manageable bites, this strategy also keeps initial costs down. This is good if the project is uncertain and the client has hired me in part to determine feasibility. Thoroughly photographing the building is very helpful. It is hard to catch everything, and the pictures help me clarify if a dimension doesn’t seem right. Arial photographs are also a good tool for understanding the neighborhood fabric and locating the North arrow (and more importantly South)
Besides basic dimensions, asbuilt plans should include basic structural information: sizes of studs and joists, direction of joists, and roof framing and slope; and location of the utilities, furnace, water heater, electrical panel, and, of course, the main sewer line. The location of the sewer line has been crucial in all three of these recent projects. When designing for a tight budget, it usually doesn’t make sense to relocate the main sewer line, and you need to make sure you can connect to it easily and with adequate slope.
The next step is schematic design. This is the most exciting part of almost any project. Sometimes unexpected solutions appear out of nowhere.
Cheerful Corner Cabinet
Posted in Design Projects, tagged color, furniture, painted plywood, plywood, whimsy, yellow on April 30, 2011| 4 Comments »
The tall cabinet is installed with a peg leg made from plumbing parts. It awaits the doors. Stay posted.

- accessory dwelling unit acoustics addition additions ADU Albany aluminum angles appleply ash bathroom Berkeley birds boxes Brooklyn buildings on the water cabin cabinets cedar children color concrete construction process copper cottage curiosities curves decks decoration desert architecture details Detroit dog doorways El Cerrito energy efficiency Fairfax fence fibercement fir fire resistant construction framing fun furniture Garage garden glass tile green green building handrail historical styles holes house houses house surgery humor indoor-outdoor interiors isba Julia Morgan kitchen landscape LED light lighting lighting design McBride Construction metal minimalism modern natural light new materials New York Oak Oakland paint painted plywood pantry paperstone passive house passive solar patterns plants plywood poet's corner Point Richmond process railings rainscreen recycled redwood remodel remodelling restaurant Richmond Rockridge roof rustic salvaged San Francisco San Mateo shou sugi ban simple skylight small buildings small spaces solar electricity sparkle stained glass steel storage Strawbale structure stucco subway tile tile tiny house trim turquoise utilitarian utility value vaulted ceiling victorian walnut water management whimsy windows wood zinc
-
link to RSS Feed

