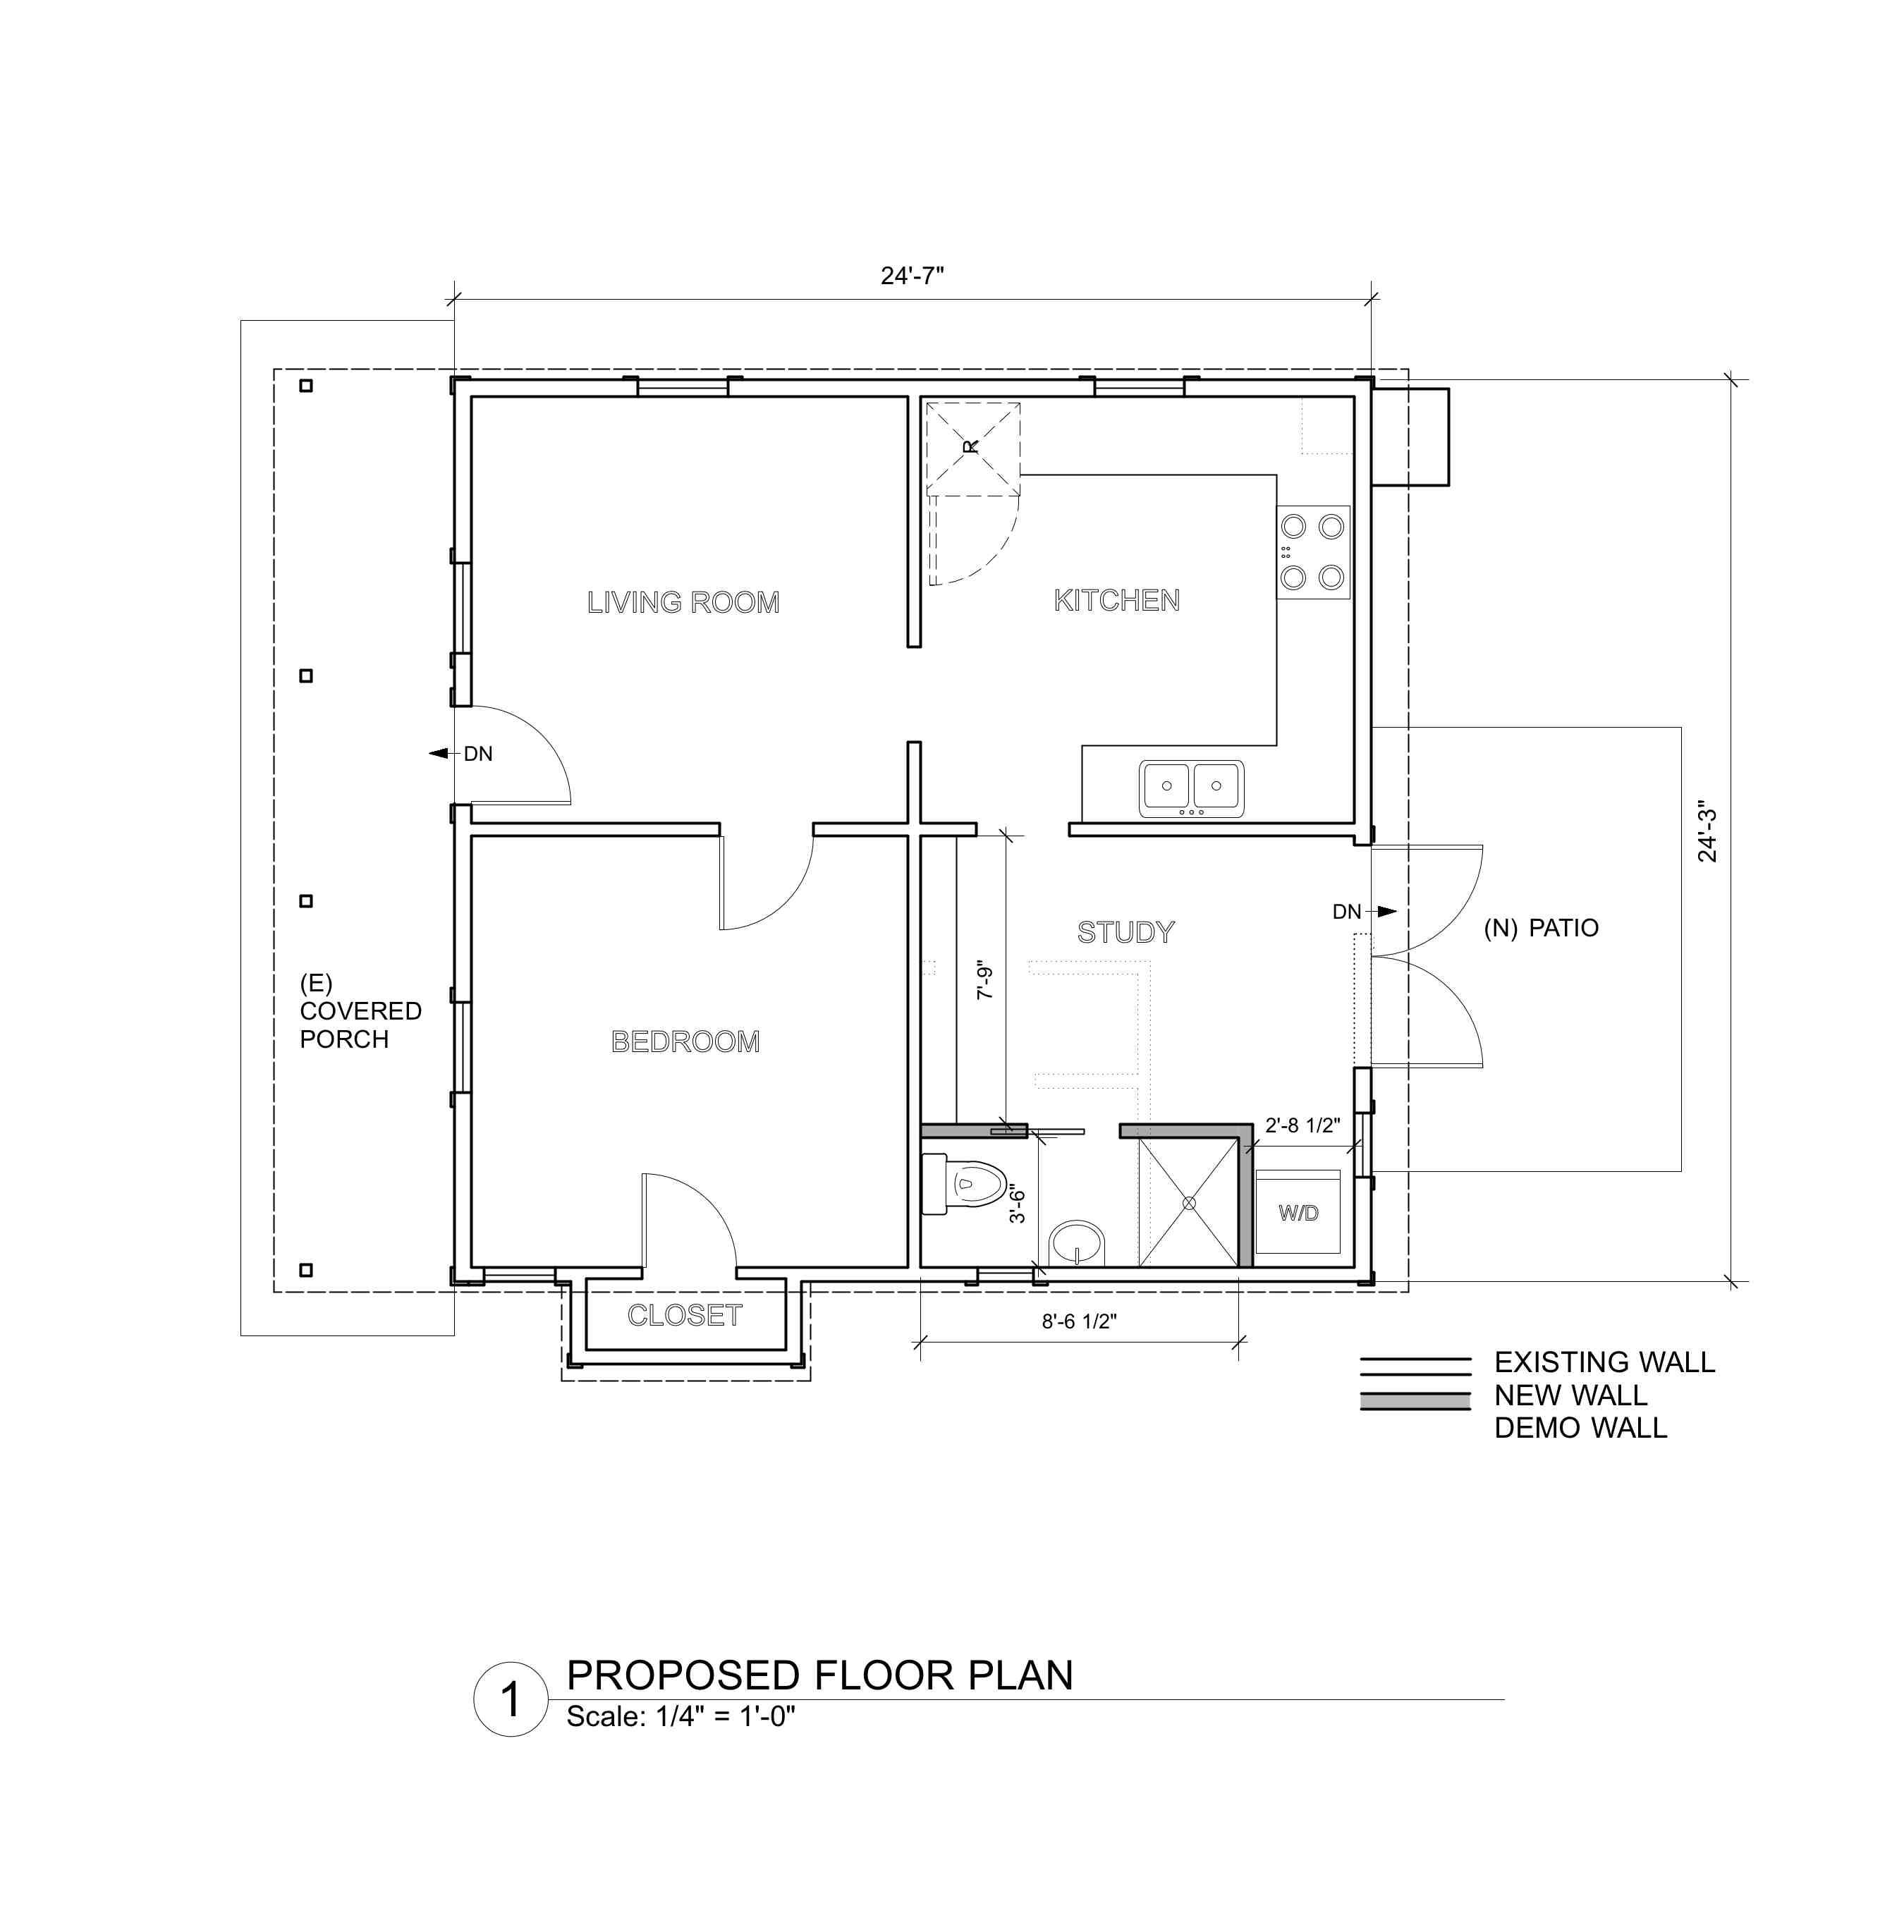
We are working on the repair and remodel of an actual 4-square cottage from the early 1900s!
Posted in Design Projects, tagged accessory dwelling unit, ADU, Berkeley, boxes, cottage, Four-square, historical styles, houses, small buildings, utilitarian on November 8, 2013| Leave a Comment »
We are working on the repair and remodel of an actual 4-square cottage from the early 1900s!
Posted in Design Projects, tagged boxes, furniture, green, paint, patterns, wood on November 15, 2012| Leave a Comment »

I finally had a chance to take a few photos of one of our most recent treasure chests. We made this one for Kavi out of maple and a painted poplar top. The hinges are special soft close hinges to protect his small fingers. The paint is my favorite Bioshield Aqua Resin Trim Enamel. I had to use a bit of a different paint for the dark brown part.
Here is a picture of Kavi and his box

Posted in Design Projects, tagged box, boxes, color, ensign, furniture, paint, patterns, poplar on February 11, 2012| 2 Comments »

This prototype is solid 1.125″ thick poplar. It also has box joint corners and a piano hinge.
I am using my old artist oils for this decorative paint job. I went to the art store for a new paintbrush and noticed that they now sell “water- mixable” oil paints. I am curious how those work.
Posted in Design Projects, tagged boxes, furniture, process on February 9, 2012| Leave a Comment »

Back of the napkin sketch – prototype 3
Posted in Design Projects, tagged boxes, continuous hinge, furniture, modern, salvaged, utilitarian on January 21, 2012| 5 Comments »

I just finished prototype treasure chest #2, using up more of my wood shop scraps.

It has a heavy Richlite lid and a piano hinge

Perfect for storing gold bullion or underwear and socks.
Posted in Design Projects, tagged bathroom, boxes, fir, furniture, plywood, pyrography, redwood, whimsy on April 22, 2011| Leave a Comment »

Prototype #1 is finished with a bit of pyrography – a prehistoric winged creature.
Apologies to customers waiting for treasure chests, this one has become my toilet paper storage box. As you can see there are many uses for such a chest. Soon we will have prototype #2 underway.
Posted in Design Projects, tagged boxes, fir, furniture, green, plywood, redwood, rope, salvaged on April 5, 2011| 2 Comments »
 I’ve made progress on the prototype. The lid is installed. I fashioned a hinge out of retired spectra running rigging from the 5o5 Bar-ba-loot (pictured below). The hinge needs a little fine-tuning, but I like the Xs. I handcarved the curves in the lid. Nice soft fir makes for easy carving.
Treasure chest Post 1 Treasure chest post 2

Posted in Design Projects, tagged boxes, fir, furniture, process, redwood, salvaged, wood on March 26, 2011| Leave a Comment »

After gluing the box together, it needed some sanding.
——————————————>
The lid is made from two fir 2×6 scraps and a redwood 2×4 scrap that John brought home from his job site. Better than average specimens, with fairly straight, tight grain; they are probably from appearance grade stock. I did not have a planer on hand, but they were pretty straight and flat. I used my new jointer to make edges flat and perpendicular to the faces. I also used the jointer to clean up the faces. (This is usually accomplished by a planer) Then I glued and clamped them together as shown in this photo.
Posted in Design Projects, tagged box, box joint, boxes, furniture, plywood, process on March 19, 2011| Leave a Comment »


